How Do I Put Videos Side by Side on Windows Movie Maker?

It's indeed common to clip multiple video clips into one video in our daily life.
Connect multiple videos by placing them close to each other on the timeline via Windows Movie Maker. If you want to put two or more videos together, the concept of timeline will inevitably be introduced. But don't worry, even if you are a novice, you can master it easily through the following steps.
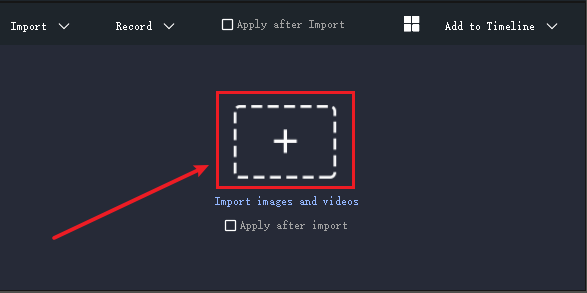
Step 1: Import the video
As you click "+" to import the video, it can be placed on the main timeline spontaneously.

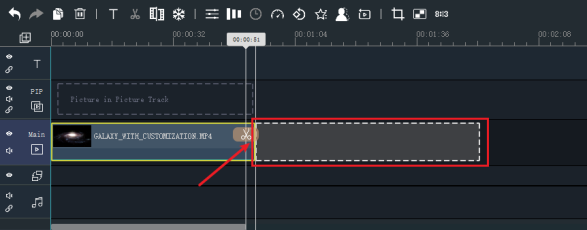
Or you can directly drag it to the main timeline.
You just drag the video to a general location, like the front and back of a video clip. When you release the mouse, it will automatically attach the previous video clip.

Step 2: Adjust the position
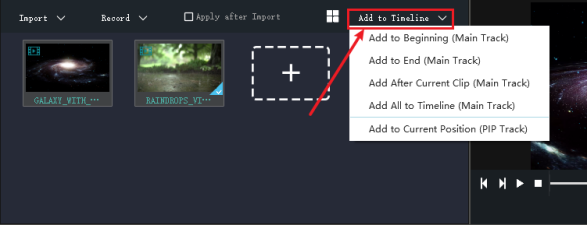
And click "Add to Timeline" to determine the video position on the timeline by hand.

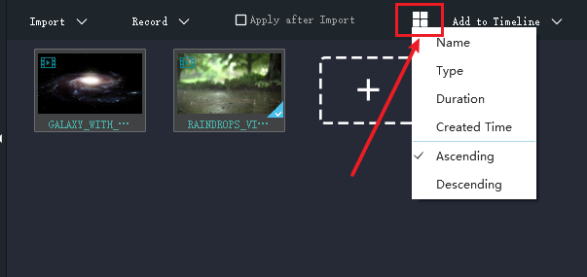
If you need to adjust the sequence of multiple videos, tap "Sort" on the left side of "Add to Timeline" and choose to arrange them by Name, Type, Duration, Created time, or just to ascend and descend videos.

Please note that this sequencing is only reflected in the imported video section. You can refer to this position to adjust the position of the video on the timeline.
Timeline is an indispensable helper in video editing. Whether it's text, PIP, transitions, music, or others, the timeline can easily connect multiple elements . So let's download the latest version of Windows Movie Maker via the official link below and have a try.


