How do I crop a video in Windows Movie Maker?
Even so often, we come across a variety of troubles triggered by video dimensions. Sometimes the video can't be played when the size of the uploaded video doesn't meet the requirements of the platform. Or we have to obtain a smaller and desired size to save the storage capacity of the equipment. A few steps below may help you remove your concerns regarding the video dimension when you use Windows Movie Maker to crop the video.
Step 1: Import the video
As you click "+" to import the video, it can be placed on the main timeline spontaneously.
Or you can drag it to the timeline directly.
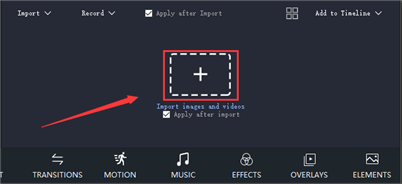
If you need to add two or more videos to the timeline, tap "Sort" and "Add To Timeline" button to sort multiple videos.

Step 2: Enter crop mode
First, you should clip the video on the Main Track and there will appear a yellow square frame.
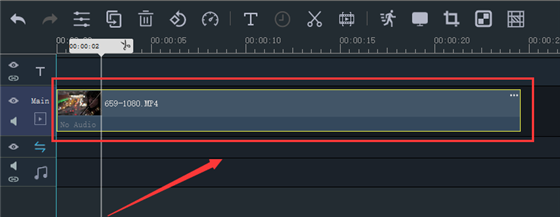
Then click "Crop"button or right-click to enter crop mode.
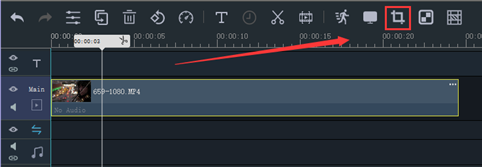
Step 3: Adjust the size
First and foremost, there are qualitative and quantitative methods to resize a video.
If the precise size couldn't be determined, you may as well drag four solid line angles of the square in terms of the video playback screen.

If you know the exact size to adjust, you can input length and width right below the video.
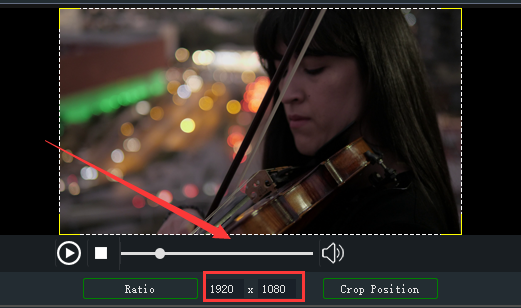
Moreover, you can refer to some preset video dimensions such as 16:9, 4:3, 1:1, 9:16 ,and so forth by clicking the "Ratio"button.

You can also tap "Crop Position"button to adjust the position of the cropping frame on the video screen.
You have these directions below to choose from
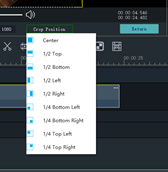
Finally, don’t forget to click "Return"to apply the new size and return to the main interface.

Now you know how to crop a video in Windows Movie Maker. And it is easy for you to master even if you're a novice. So let's download the latest version of Windows Movie Maker via the official link below and have a try.


